Pinterest

FB Pixel

Pin it!

22.10.23

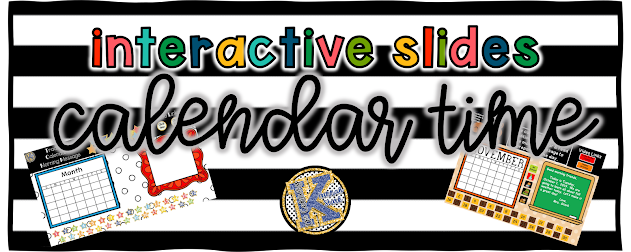
Interactive Slides for Calendar Time


When I first started teaching almost 20 years ago, I taught an ungraded primary class and I had kindergartners and first graders together. I switched with my partner teacher for the core academic areas and I just taught the first graders, but for our thematic times, our lunch and specials and home room times we were together as a mix of K and 1. Calendar was the perfect way to start our day. It gave us a routine, we learned lots of basic skills and it was completely age appropriate for my kindergartners and my first graders. I absolutely loved it and we did it up right. I had a huge bulletin board. I bet you had one too. It had a flip chart on it for all the days of the week, a calendar where we would put the date up and it would be a pattern every time, or those really cute picture ones that went with the month's theme. We had the weather bear and we would change his clothes based on how the weather looked outside when we peeked out the window. Kids would help. And oh the songs. We would sing a song for every activity on our calendar board. It was the best way to start the day. It was a routine. Kids loved it. Kids joined in. It was like the quintessential kindergarten picture of all these little friends on the carpet listening and learning and singing and talking and counting. It was my favorite part of the day. It still is. 

But after I took some time to be an interventionist and then went back to the kindergarten classroom, my favorite time wasn't my students favorite time. When I got my new classroom set up to teach kindergarten after funding was cut and I was no longer an interventionist, the first thing I did was set up that calendar bulletin board. It was new and improved. I had learned how to use the computer so everything was typed out and laminated, that we had Velcro, we had straws and bundled them together with rubber bands, and we even were going to make a paper chain of all the days of the year to hang around the classroom. It was going to be epic, except that it wasn't. It was an epic fail. My kids did not love it. 

I had been out of the classroom for about five years and just doing intervention and in that amount of time something had happened. Teaching had changed, classroom resources had changed and kids had changed. And I was still the same, trying to do calendar like I always had, and I even had a new CD player with new songs. And I was devastated when my students were disengaged, misbehaving and not learning. I was completely at a loss. But each day that passed I would leave another activity off. I would get more frustrated when my children didn't know what tomorrow was going to be. 

After we had chanted the days of the week over and over for two weeks, I was sending more children away from the carpet and back to their seat to not be part of the group, because they couldn't behave, because they weren't attending, because I wasn't providing instruction that was engaging for them. Kids just five years later were not engaged by the same activities that my students had once loved, and I was heartbroken. I thought about ditching it all together, but I knew that this traditional kindergarten practice still had validity. It was still an important thing for the kindergarten day. I just needed to make it better, more accessible, more engaging, more involving of the students and more appropriate for 21st century kindergartners. I began thinking about how I could change things up. In a couple of days, I decided not to play a song for my CD player and to show YouTube video that maybe reviewed the same concept. It was like magic. My kids on the carpet were paying attention, they were singing along, they were learning, they were engaged with the content. 

But my work didn't stop there. I began to realize that a traditional bulletin board calendar with all the bells and whistles of years gone by wasn't the best thing for my current students and that I needed to change my delivery and my content in order to meet these kids where they were, because they were different. They were not the same. They have a world with the internet in their hands, and my first students did not. Even though the time between was so short, big changes had happened and were continuing to happen in the classroom. I had a smart board for the first time and I started thinking maybe I could use the smart board for my activities and started learning about the program, smart notebook and also PowerPoint, learning more about YouTube, and decided to start incorporating all of those things into calendar time instead of the traditional bulletin board. I came up with five steps to creating a better, more engaging calendar time and it really changed my classroom. It changed my teaching, it changed my outlook on teaching, it changed our classroom community and it just improved everything from that point forward and it bled into other areas of my curriculum as well. You don't have to use the smart board or technology to make calendar better, but when you incorporate these five steps, I guarantee your children will learn more, enjoy it more and be more engaged. 

First I made calendar time more challenging. I realized that doing the same exact thing over and over and over and over again for days and weeks was a routine that I enjoyed and maybe students from five years previously had enjoyed, but these kids didn't. They crave a schedule and a routine, but not monotony. They're used to their life going the speed of light and they're used to a screen that flashes at a rate far faster than me and my weather bear bulletin board and my CD player In order to keep them engaged. I had to keep them mentally challenged, and so I began thinking about how I could incorporate my standards and change activities over the course of the school year. So, month by month, I would sort of up the ante on the activities that we were doing and change things up to spice it up, and found that my kids really were learning and really were advancing along, especially in their math instruction, in their math areas, math standards. 

The second thing I did to improve my calendar time was to keep it Current. Kids wanted to do things that were current to them, not old school. So, yes, we gave up the Adams family days of the week chant and we started finding more fun things online. Harry Kindergarten became a quick favorite and Jack Hartman I don't care what anybody says, he's a classic. The kids love all of his videos and he continues to change and go with the flow. In order to keep his content current and it just played right into my hand I started keeping calendar time concise. 

Oh, in the day I can make calendar time take upwards of an hour or more, but I started losing my current students when I did that by condensing it down and clipping through some of the activities a little quicker or focusing more on one activity than others each day. I found that my students were engaged and by mixing the time up, it sort of kept them guessing and they were able to anticipate what was coming next, while also being surprised with new activities, and that really, really helps with student engagement. I began to use calendar time more as a way to build classroom community and by building classroom community during calendar time, students were able to take are able to take a turn leading, they're able to contribute. Many times calendar is the only time that some of those most struggling students can throw out an answer and feel confident. So by using those students as leaders and helpers and getting them up to the smart board to move stuff around and engage with technology and each other, really, really improved my sense of classroom community and gave that calendar time a new meaning and it's really become the anchor of our school day. 

Lastly, I had to get creative. By making my calendar time more seasonal. With fun graphics, with cooler activities, with interactive components and, of course, with engaging songs and videos, I'm able to keep my students attention. Here's the crazy part that stuff that I was so worried about teaching them. It just comes naturally and my students excel in math because I've carefully planned and thought out my calendar time. It's not just to pass the time, it's not just to check a box. I'm really incorporating my standards, and any time you are intentional about incorporating your standards in your school day, you're gonna be successful. So I took this old school kindergarten practice of calendar and tried to bring it into the 21st century. It has been epic this time around, instead of an epic fail like it was when I first started, and it's still my most favorite part of the school day. 

Hey, have you ever thought about making your own interactive slide decks? Maybe the thought has you feeling overwhelmed because you don't understand the technology, or there are just so many options you don't even know where to begin. Well, don't worry, I've got you. I am working on an interactive slides masterclass, a one-time course you can take at your own pace to learn all the tips and tricks I know for creating interactive slide decks that you and your students will love. We'll talk about how to create interactive slides like my calendars and literacy reviews, and also daily focus slides that you can use in your classroom every day of the school year. We'll even talk about how you can come up with your own ideas to create slides that you can sell yourself. I mean, if we're going to do all this work for our own classrooms, why not help other teachers and make a little passive income on the side, right? If you are interested, CLICK HERE to register!


14.10.23

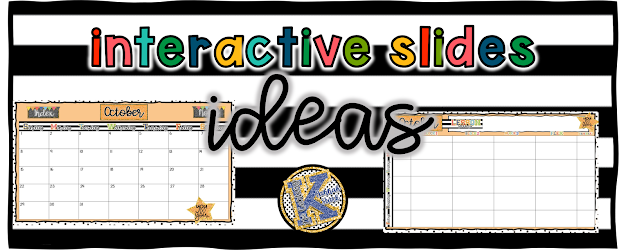
Interactive Slide Ideas


Welcome to the 21st Century K Podcast. I'm Hannah, I teach elementary school and I help other teachers bridge the gap between traditional elementary and 21st century expectations. This week, we're going to wrap up our series of tips and tricks on using interactive slides in the classroom with a full-on list of all the ways you might be able to use interactive slides in your classroom, starting today. Thanks for joining. If you've been with me for the last few weeks, you have been picking up new tips and tricks for using interactive slides in the classroom. It's kind of become my thing, and when I started working on this podcast episode, that's when it really hit me how much I rely on all the different types of slides I've created in the classroom every single day, from communicating with families to guiding myself through lessons, to assigning things to my students, to my lesson plans. I am a slide debt girl through and through and I'm super excited to round out this series of tips and tricks with a list of ways that you might be inspired to use interactive slides in your classroom, starting today. Maybe the first way that I use interactive slides is lesson planning. I have created some background templates that I add to a slide deck to put my text boxes over top and fill in my lesson plans every single week. 

A few years ago, I was a paper pencil only lesson planning girl. I love to bring my spiral book home the big one that took up the whole desk. I would bring it home and I would get my number two mechanical pencil and I would write everything in over the weekend. When I got really good at budgeting my time, I would write my lesson plans on Wednesdays ahead of time. Then, when the book just wasn't working for me anymore, I designed my own templates and printed them out and I hand wrote on my lesson plan pages. But when I started teaching online, it just seemed redundant. I needed to access my resources digitally, and so writing them was an extra step that I just didn't have time for, and that's when I switched over to lesson planning using Google Slides. I've also used Google Sheets, and if you love Google Sheets, then there's so many cool things you can do to lesson plan with Google Sheets. But I love the ease of creating a background template, putting it on a slide deck and then adding my text and links over top of that. 

The best part about lesson planning with Google Slides is that you can share it with your administrators and teammates and it's there for you. Year after year. I just make a copy of the same slide deck, adjust the dates and then adjust my plans as I go along every week. As long as I'm teaching the same grade, I have my lesson plans there for me. In fact, I share my kindergarten and fourth grade lesson plan with Google Slides every Sunday over on my Instagram account at 21st Century EK, if you're interested in checking those out. 

The other way that I use slides to help myself is by creating a personal calendar slide that I keep with my lesson plans. I also keep a slide in my lesson plan deck that has list rosters for each of my classes, that has a master's schedule and information about when my morning duty is, my afternoon responsibilities and everything in between, so that if a coworker needed to access it to help a sub or to plan something in the event I can't be there, they can find whatever they need right in that slide deck. The next way that I use slides is that daily focus slide that I've talked so much about. That is just crucial to my success. When I'm actually in the classroom teaching. I refer to those slides multiple times every single day. I use the links to project books and other slide deck resources that my students will use and then I turn around and give them and their families access so that when they need that information they can get it. I link it in my email every single day. 

I use slide decks for more than just communicating that sort of information to families. I set up a Google website for my team this year and we have slides with information about each subject each day of the week. So when parents click that link, they're taken to a slide in present mode that shows them what each teacher is covering. It has links to resources that families can use and information that parents might need to know for the week. The great part about this is we send the same link to families every single day, but it's a live link because we send it in present mode and when we go in and make changes and they go in and click, they can see what we've changed. Saves a lot of time on our end and we don't have to keep recreating links for our families to get to information that we wanna share. We have another slide deck that's very similar, with news and information from the school level, from our assistant principal's newsletter all the way down to our school handbook and our breakfast and lunch menus, so when parents access that slide deck, they have buttons and links that take them to all of those things. It's been super useful this year. 

Then I use my slides to actually teach. My favorite part of teaching kindergarten is calendar time, and so I have calendar slide decks to cover all the math standards and then some. I love spending time with my students every morning going through the routines. I have linked YouTube videos and songs that we enjoy every single day. Now that I teach the big kids, though, I created a slide deck for them. They come in every morning, they go to Google Classroom, they pull up their calendar, there's a mood tracker and a weather tracker and a planner where they can learn to manipulate those things and use it as they choose. I really think they enjoy it actually every day. And then I also use interactive slides for teaching and reviewing literacy skills and lots of other things. Along with my kindergarten curriculum, I've got a slide for each subject so that I know what I'm teaching each unit and my links for videos and resources are right there. And then I have those trusty library slides that I found, and some that I created during the pandemic, that just have links to gobs and gobs of books and videos and games that are all thematic based. I can find one of those for just about every week of the school year and it just adds another layer of resources in my bag of tricks for teaching that week. 

Now that I teach older kids, I assign Google Slides in Google Classroom every single week On Wednesdays. We call it workbook Wednesdays and my students can practice reading online and answering questions online. I like using slide decks because of the ease of making a background they can't manipulate and then adding text boxes that they can type in and that I can go in and check and respond and help them as they learn to work online. I also can assign other slide decks for my students online. They have a weekly planner and choice board slide where they can show me the extra things they're doing to go above and beyond, and they can keep themselves on track by checking off tasks as they complete them for the week. 

There are really so many ways to use interactive slides in the classroom. Once you jump in and start imagining the possibilities, I am super excited to be right along your side as you begin to use interactive slides in your classroom, and I have just the thing to help you do it. If you're feeling afraid of making your own background images, don't worry. I have a new set of over 100 background images that you can copy and paste right into your own slide decks to create everything from lesson plans to to-do list, to daily slides and to interactive activities for your students. All you have to do is pop them in, add the text, add the links, add the images on top and you're ready to go. 

Hey, have you ever thought about making your own interactive slide decks? Maybe the thought has you feeling overwhelmed because you don't understand the technology, or there are just so many options you don't even know where to begin. Well, don't worry, I've got you. I am working on an interactive slides masterclass, a one-time course you can take at your own pace to learn all the tips and tricks I know for creating interactive slide decks that you and your students will love. We'll talk about how to create interactive slides like my calendars and literacy reviews, and also daily focus slides that you can use in your classroom every day of the school year. We'll even talk about how you can come up with your own ideas to create slides that you can sell yourself. I mean, if we're going to do all this work for our own classrooms, why not help other teachers and make a little passive income on the side, right? CLICK HERE TO REGISTER!


Linking Interactive Slides

Welcome to the 21st Century K podcast. I'm Hannah, I teach elementary school and I help other teachers bridge the gap between traditional elementary and 21st century expectations. In this episode, we're continuing on in our series with tips and tricks for using interactive slides in the classroom, and today it's all about links. Thanks for joining. Are you ready to jump in and start making your own slide decks? Are you ready to take your interactive slide game to the next level? Well, I am here for you. Check out the show notes to find links to my new free ebook with the three easy ways you can start using interactive slides in your classroom today, including some of the things we've talked about on the podcast. You can also link to a brand new resource that is over 100 pre-designed coordinated slide deck backgrounds. There are some for every season and holiday. You can use them for lesson planning, for desktop backgrounds, for student activities, daily slides whatever you can dream up you can create with these pre-made backgrounds. Maybe you are really ready to jump in, but you need a little help and guidance. I've got you there too. Be sure to sign up on the wait list for my new course interactive slides master class that will be coming out in October 2023. Sign up on the list so that you'll be the first to know when it's ready. 

Welcome back on our series of episodes with tips and tricks for using interactive slides in the classroom. Two weeks ago, we talked about using daily focus slides and how I started using them back during the pandemic and continue to use them teaching in person, to keep my lessons on track and focus and to keep my online resources right there at the click of a button. Last week, we talked about sharing those slides with stakeholders, from administrators to subs, to co-teachers and even to students and families. Today, we're going to backtrack a little, because maybe you haven't started using interactive slides or maybe you need to up your slide game. So this episode is all about links and how to add links to your slides and what to link so that you can get what you need in one click of your mouse. 

So if you're using slides for teaching, whether it be to organize your daily lessons or to create lesson plans, you really just need to hyperlink text. So if it's for the teacher, for instance, I use a slide deck for my lesson planner. I have a template and I create text boxes and I type in what I'm doing for each part of each day each week, and so sometimes I want to link up a website or a video or even another slide deck or another place within my Google Drive. To do this, all you have to do is add a text hyperlink. You highlight the text that you want to become your clickable button, if you will, and then you click the link button. Or you could right click and add a hyperlink and then you paste in the address of wherever it is you want that link to go. So that would be, I think, the best way to link something within lesson plans. Now, if it's for display, like your daily slides or something that you might send to parents or students, you most certainly can link text in this way. But another thing you can do is link an entire text box. So if it's something that has a lot of text in it, you can highlight and link the text, but you know it turns it blue and puts the line under it. It kind of changes the aesthetic of your slide. So if you will just select the text box and then add your link in the same way, it will make the entire text box a link so that when they click on the box it will take them wherever it is that you want them to go or that you want to go. 

The other way to add a link easily is to add a hyperlink to an image, and I do this a lot. I do this in my daily email when I link the screenshot of my daily slides. I do this sometimes in my lesson plans. If I've created a little button and I want that button to go somewhere, I might add a hyperlink to an image. I do it a lot with my daily slides. So if we have books that we're going to read for the week, or if we have another slide in our slide deck that I want to make a button or an image for, then I would link the graphic on the slide. It's just the same as linking text. So you highlight whatever image you want to create a link for and then you can click the link button in your menu, or you can right click, add a link and put it in that way, or two fingers click. 

If you're working on a Chromebook with a touchpad and maybe you're not a right clicker anymore, that's kind of going away, I think, because people are not using mice regularly, so the two finger click is just as important as the right click anymore. So that would be how you could add a link to your images. So if you're sharing with students maybe you have every week I have a little bookshelf on my daily slides and I just go to Google and I copy images that are the cover of the books that I'm going to use. I find the best videos on YouTube or record my own, and then I go back and link those to the image of the book cover so that when my students or I or their families click the picture of the book cover, it takes them to the video with that story. So pretty cool. In my plans I would just link, obviously, the text if I put the title in, but when it comes to presenting on the screen or sharing with students and families, I might add an image and hyperlink the image. 

The other way that you can include things by linking them in your slide decks is by embedding them, and so if you go to your insert menu on Google Slides, you can choose to add a video or add a sound, and when you choose from there, you are prompted with a box where you can add either the link to the video that's in your drive or the link to the video that's on YouTube and when you click Insert or Add, that video sort of pops up like a rectangle that looks like the actual video and has a play button on it, and this is called embedding the video. So what this means is when you embed a video, they're gonna watch it within the slide deck. So before, when I just hyperlinked that little book cover, when I click on that it takes me out of Google Drive to YouTube or wherever. The video is kept in a new window and I'm looking at a totally different site. When you embed the video, it stays right there on the slide and it is viewed within your slide deck. The cool thing about this is that you can resize embedded videos so you can make them, if you get really fancy, fit to the size of a little clip art you have that maybe looks like a TV screen or a smart board screen or a computer screen, or you can fit it inside a frame, or you can make it as big as the screen or almost as big as the screen, so that students could watch it right there. The beauty of this is, when using interactive slides with students for their use, you keep them right there in their Google Drive on their slide deck. They're not going out to YouTube where well, let's face it, who knows what could happen? When you keep them right there embedded in your slide, then you know they're not going to stray or wander to other videos because it's just going to show that video right there on your slide. 

For my lessons I use this all the time. For my daily slides I use it as well. I have embedded a little 10-minute timer YouTube video with some music and it's on a little clip art computer screen on a little desk in my little Bitmoji classroom. That is my daily focus slide when we are working on our journals each morning as our bell ringer when we start the day, I just click play and it plays that little 10-minute timer YouTube video right there on the slide. My students can still see everything else that's on there as they're getting settled for the class period. They can read our to-do list, they can see what stories we might read and they can watch the timer all as it counts down all at the same time. So embedding videos is very useful when you are going to have students interacting with YouTube while they're at school or working on an assignment. It goes for any other videos as well. You can embed them just the same way and they will show up. During the pandemic I recorded myself teaching 100 phonics lessons and I saved those videos and can still use them today, and I embed them into a slide that has other phonics resources on it and my students could watch it right there on the slide. So pretty useful to be able to embed videos for your students. Now, what might you want to embed or what might you want to link besides just a YouTube video, because I know we use those a lot as teachers. 

But there are lots of other things that you can link, either within your teaching and student slides or within your own lesson planning slides. I love to link videos, obviously, but also I link a lot to other files within my drive. So if I have another slide deck that's created with, say, all of our anchor charts, I will link an image of the anchor chart on the daily slide deck so that when I click it it pops up in present mode and there's the anchor chart filling the screen and we can discuss it, or my students can access that anchor chart resource for themselves to help them do their work. In my lesson plans. I also link other resources that I have saved in my drive. So on my lesson plan slide deck I will have a link each week to my focus slide deck so that I can toggle between the two really easily. 

And once you get adept at making links and you're thinking about what could you link up, you'll think of lots of other things that you might want to link. 

I'll link teacher pay to teachers pay, teachers resources that I've purchased in my plan so I can go straight to that file and grab what I need. 

I will link to a co-teachers plan or link to the actual unit we've created from my lesson plan so that if I need a more detailed picture or my administrator does, they can go straight from my plan book to my bigger unit plan. 

I also link to places where I might keep student names or class lists or other information, as well as the things that I'm going to assign to my students, so I can find them easily, to update them and make sure when I assign them in Google classroom I have exactly what I'm looking for. So the tip for today is to link text and images on your slide deck and a great trick is to embed those videos, especially when students are going to be using the slide deck to access something, a video on another site. This keeps them focused on the lesson and keeps them in their Google Drive, where it's much safer, and they're less tempted to wander and stray off to other videos or other sites. What other things can you think of to link up? I'm sure there are tons of resources, tons of slide decks, tons of videos, websites and games that you might be able to link for yourself and for your students on your interactive slides. I hope this helps. Thanks for listening. 
Hey, have you ever thought about making your own interactive slide decks? Maybe the thought has you feeling overwhelmed because you don't understand the technology, or there are just so many options you don't even know where to begin. Well, don't worry, I've got you. I am working on an interactive slides masterclass, a one-time course you can take at your own pace to learn all the tips and tricks I know for creating interactive slide decks that you and your students will love. We'll talk about how to create interactive slides like my calendars and literacy reviews, and also daily focus slides that you can use in your classroom every day of the school year. We'll even talk about how you can come up with your own ideas to create slides that you can sell yourself. I mean, if we're going to do all this work for our own classrooms, why not help other teachers and make a little passive income on the side, right? CLICK HERE TO REGISTER!