Pinterest

FB Pixel

Pin it!

22.10.23

Interactive Slides for Calendar Time


When I first started teaching almost 20 years ago, I taught an ungraded primary class and I had kindergartners and first graders together. I switched with my partner teacher for the core academic areas and I just taught the first graders, but for our thematic times, our lunch and specials and home room times we were together as a mix of K and 1. Calendar was the perfect way to start our day. It gave us a routine, we learned lots of basic skills and it was completely age appropriate for my kindergartners and my first graders. I absolutely loved it and we did it up right. I had a huge bulletin board. I bet you had one too. It had a flip chart on it for all the days of the week, a calendar where we would put the date up and it would be a pattern every time, or those really cute picture ones that went with the month's theme. We had the weather bear and we would change his clothes based on how the weather looked outside when we peeked out the window. Kids would help. And oh the songs. We would sing a song for every activity on our calendar board. It was the best way to start the day. It was a routine. Kids loved it. Kids joined in. It was like the quintessential kindergarten picture of all these little friends on the carpet listening and learning and singing and talking and counting. It was my favorite part of the day. It still is. 

But after I took some time to be an interventionist and then went back to the kindergarten classroom, my favorite time wasn't my students favorite time. When I got my new classroom set up to teach kindergarten after funding was cut and I was no longer an interventionist, the first thing I did was set up that calendar bulletin board. It was new and improved. I had learned how to use the computer so everything was typed out and laminated, that we had Velcro, we had straws and bundled them together with rubber bands, and we even were going to make a paper chain of all the days of the year to hang around the classroom. It was going to be epic, except that it wasn't. It was an epic fail. My kids did not love it. 

I had been out of the classroom for about five years and just doing intervention and in that amount of time something had happened. Teaching had changed, classroom resources had changed and kids had changed. And I was still the same, trying to do calendar like I always had, and I even had a new CD player with new songs. And I was devastated when my students were disengaged, misbehaving and not learning. I was completely at a loss. But each day that passed I would leave another activity off. I would get more frustrated when my children didn't know what tomorrow was going to be. 

After we had chanted the days of the week over and over for two weeks, I was sending more children away from the carpet and back to their seat to not be part of the group, because they couldn't behave, because they weren't attending, because I wasn't providing instruction that was engaging for them. Kids just five years later were not engaged by the same activities that my students had once loved, and I was heartbroken. I thought about ditching it all together, but I knew that this traditional kindergarten practice still had validity. It was still an important thing for the kindergarten day. I just needed to make it better, more accessible, more engaging, more involving of the students and more appropriate for 21st century kindergartners. I began thinking about how I could change things up. In a couple of days, I decided not to play a song for my CD player and to show YouTube video that maybe reviewed the same concept. It was like magic. My kids on the carpet were paying attention, they were singing along, they were learning, they were engaged with the content. 

But my work didn't stop there. I began to realize that a traditional bulletin board calendar with all the bells and whistles of years gone by wasn't the best thing for my current students and that I needed to change my delivery and my content in order to meet these kids where they were, because they were different. They were not the same. They have a world with the internet in their hands, and my first students did not. Even though the time between was so short, big changes had happened and were continuing to happen in the classroom. I had a smart board for the first time and I started thinking maybe I could use the smart board for my activities and started learning about the program, smart notebook and also PowerPoint, learning more about YouTube, and decided to start incorporating all of those things into calendar time instead of the traditional bulletin board. I came up with five steps to creating a better, more engaging calendar time and it really changed my classroom. It changed my teaching, it changed my outlook on teaching, it changed our classroom community and it just improved everything from that point forward and it bled into other areas of my curriculum as well. You don't have to use the smart board or technology to make calendar better, but when you incorporate these five steps, I guarantee your children will learn more, enjoy it more and be more engaged. 

First I made calendar time more challenging. I realized that doing the same exact thing over and over and over and over again for days and weeks was a routine that I enjoyed and maybe students from five years previously had enjoyed, but these kids didn't. They crave a schedule and a routine, but not monotony. They're used to their life going the speed of light and they're used to a screen that flashes at a rate far faster than me and my weather bear bulletin board and my CD player In order to keep them engaged. I had to keep them mentally challenged, and so I began thinking about how I could incorporate my standards and change activities over the course of the school year. So, month by month, I would sort of up the ante on the activities that we were doing and change things up to spice it up, and found that my kids really were learning and really were advancing along, especially in their math instruction, in their math areas, math standards. 

The second thing I did to improve my calendar time was to keep it Current. Kids wanted to do things that were current to them, not old school. So, yes, we gave up the Adams family days of the week chant and we started finding more fun things online. Harry Kindergarten became a quick favorite and Jack Hartman I don't care what anybody says, he's a classic. The kids love all of his videos and he continues to change and go with the flow. In order to keep his content current and it just played right into my hand I started keeping calendar time concise. 

Oh, in the day I can make calendar time take upwards of an hour or more, but I started losing my current students when I did that by condensing it down and clipping through some of the activities a little quicker or focusing more on one activity than others each day. I found that my students were engaged and by mixing the time up, it sort of kept them guessing and they were able to anticipate what was coming next, while also being surprised with new activities, and that really, really helps with student engagement. I began to use calendar time more as a way to build classroom community and by building classroom community during calendar time, students were able to take are able to take a turn leading, they're able to contribute. Many times calendar is the only time that some of those most struggling students can throw out an answer and feel confident. So by using those students as leaders and helpers and getting them up to the smart board to move stuff around and engage with technology and each other, really, really improved my sense of classroom community and gave that calendar time a new meaning and it's really become the anchor of our school day. 

Lastly, I had to get creative. By making my calendar time more seasonal. With fun graphics, with cooler activities, with interactive components and, of course, with engaging songs and videos, I'm able to keep my students attention. Here's the crazy part that stuff that I was so worried about teaching them. It just comes naturally and my students excel in math because I've carefully planned and thought out my calendar time. It's not just to pass the time, it's not just to check a box. I'm really incorporating my standards, and any time you are intentional about incorporating your standards in your school day, you're gonna be successful. So I took this old school kindergarten practice of calendar and tried to bring it into the 21st century. It has been epic this time around, instead of an epic fail like it was when I first started, and it's still my most favorite part of the school day. 

Hey, have you ever thought about making your own interactive slide decks? Maybe the thought has you feeling overwhelmed because you don't understand the technology, or there are just so many options you don't even know where to begin. Well, don't worry, I've got you. I am working on an interactive slides masterclass, a one-time course you can take at your own pace to learn all the tips and tricks I know for creating interactive slide decks that you and your students will love. We'll talk about how to create interactive slides like my calendars and literacy reviews, and also daily focus slides that you can use in your classroom every day of the school year. We'll even talk about how you can come up with your own ideas to create slides that you can sell yourself. I mean, if we're going to do all this work for our own classrooms, why not help other teachers and make a little passive income on the side, right? If you are interested, CLICK HERE to register!


14.10.23

Interactive Slide Ideas


Welcome to the 21st Century K Podcast. I'm Hannah, I teach elementary school and I help other teachers bridge the gap between traditional elementary and 21st century expectations. This week, we're going to wrap up our series of tips and tricks on using interactive slides in the classroom with a full-on list of all the ways you might be able to use interactive slides in your classroom, starting today. Thanks for joining. If you've been with me for the last few weeks, you have been picking up new tips and tricks for using interactive slides in the classroom. It's kind of become my thing, and when I started working on this podcast episode, that's when it really hit me how much I rely on all the different types of slides I've created in the classroom every single day, from communicating with families to guiding myself through lessons, to assigning things to my students, to my lesson plans. I am a slide debt girl through and through and I'm super excited to round out this series of tips and tricks with a list of ways that you might be inspired to use interactive slides in your classroom, starting today. Maybe the first way that I use interactive slides is lesson planning. I have created some background templates that I add to a slide deck to put my text boxes over top and fill in my lesson plans every single week. 

A few years ago, I was a paper pencil only lesson planning girl. I love to bring my spiral book home the big one that took up the whole desk. I would bring it home and I would get my number two mechanical pencil and I would write everything in over the weekend. When I got really good at budgeting my time, I would write my lesson plans on Wednesdays ahead of time. Then, when the book just wasn't working for me anymore, I designed my own templates and printed them out and I hand wrote on my lesson plan pages. But when I started teaching online, it just seemed redundant. I needed to access my resources digitally, and so writing them was an extra step that I just didn't have time for, and that's when I switched over to lesson planning using Google Slides. I've also used Google Sheets, and if you love Google Sheets, then there's so many cool things you can do to lesson plan with Google Sheets. But I love the ease of creating a background template, putting it on a slide deck and then adding my text and links over top of that. 

The best part about lesson planning with Google Slides is that you can share it with your administrators and teammates and it's there for you. Year after year. I just make a copy of the same slide deck, adjust the dates and then adjust my plans as I go along every week. As long as I'm teaching the same grade, I have my lesson plans there for me. In fact, I share my kindergarten and fourth grade lesson plan with Google Slides every Sunday over on my Instagram account at 21st Century EK, if you're interested in checking those out. 

The other way that I use slides to help myself is by creating a personal calendar slide that I keep with my lesson plans. I also keep a slide in my lesson plan deck that has list rosters for each of my classes, that has a master's schedule and information about when my morning duty is, my afternoon responsibilities and everything in between, so that if a coworker needed to access it to help a sub or to plan something in the event I can't be there, they can find whatever they need right in that slide deck. The next way that I use slides is that daily focus slide that I've talked so much about. That is just crucial to my success. When I'm actually in the classroom teaching. I refer to those slides multiple times every single day. I use the links to project books and other slide deck resources that my students will use and then I turn around and give them and their families access so that when they need that information they can get it. I link it in my email every single day. 

I use slide decks for more than just communicating that sort of information to families. I set up a Google website for my team this year and we have slides with information about each subject each day of the week. So when parents click that link, they're taken to a slide in present mode that shows them what each teacher is covering. It has links to resources that families can use and information that parents might need to know for the week. The great part about this is we send the same link to families every single day, but it's a live link because we send it in present mode and when we go in and make changes and they go in and click, they can see what we've changed. Saves a lot of time on our end and we don't have to keep recreating links for our families to get to information that we wanna share. We have another slide deck that's very similar, with news and information from the school level, from our assistant principal's newsletter all the way down to our school handbook and our breakfast and lunch menus, so when parents access that slide deck, they have buttons and links that take them to all of those things. It's been super useful this year. 

Then I use my slides to actually teach. My favorite part of teaching kindergarten is calendar time, and so I have calendar slide decks to cover all the math standards and then some. I love spending time with my students every morning going through the routines. I have linked YouTube videos and songs that we enjoy every single day. Now that I teach the big kids, though, I created a slide deck for them. They come in every morning, they go to Google Classroom, they pull up their calendar, there's a mood tracker and a weather tracker and a planner where they can learn to manipulate those things and use it as they choose. I really think they enjoy it actually every day. And then I also use interactive slides for teaching and reviewing literacy skills and lots of other things. Along with my kindergarten curriculum, I've got a slide for each subject so that I know what I'm teaching each unit and my links for videos and resources are right there. And then I have those trusty library slides that I found, and some that I created during the pandemic, that just have links to gobs and gobs of books and videos and games that are all thematic based. I can find one of those for just about every week of the school year and it just adds another layer of resources in my bag of tricks for teaching that week. 

Now that I teach older kids, I assign Google Slides in Google Classroom every single week On Wednesdays. We call it workbook Wednesdays and my students can practice reading online and answering questions online. I like using slide decks because of the ease of making a background they can't manipulate and then adding text boxes that they can type in and that I can go in and check and respond and help them as they learn to work online. I also can assign other slide decks for my students online. They have a weekly planner and choice board slide where they can show me the extra things they're doing to go above and beyond, and they can keep themselves on track by checking off tasks as they complete them for the week. 

There are really so many ways to use interactive slides in the classroom. Once you jump in and start imagining the possibilities, I am super excited to be right along your side as you begin to use interactive slides in your classroom, and I have just the thing to help you do it. If you're feeling afraid of making your own background images, don't worry. I have a new set of over 100 background images that you can copy and paste right into your own slide decks to create everything from lesson plans to to-do list, to daily slides and to interactive activities for your students. All you have to do is pop them in, add the text, add the links, add the images on top and you're ready to go. 

Hey, have you ever thought about making your own interactive slide decks? Maybe the thought has you feeling overwhelmed because you don't understand the technology, or there are just so many options you don't even know where to begin. Well, don't worry, I've got you. I am working on an interactive slides masterclass, a one-time course you can take at your own pace to learn all the tips and tricks I know for creating interactive slide decks that you and your students will love. We'll talk about how to create interactive slides like my calendars and literacy reviews, and also daily focus slides that you can use in your classroom every day of the school year. We'll even talk about how you can come up with your own ideas to create slides that you can sell yourself. I mean, if we're going to do all this work for our own classrooms, why not help other teachers and make a little passive income on the side, right? CLICK HERE TO REGISTER!


Linking Interactive Slides

Welcome to the 21st Century K podcast. I'm Hannah, I teach elementary school and I help other teachers bridge the gap between traditional elementary and 21st century expectations. In this episode, we're continuing on in our series with tips and tricks for using interactive slides in the classroom, and today it's all about links. Thanks for joining. Are you ready to jump in and start making your own slide decks? Are you ready to take your interactive slide game to the next level? Well, I am here for you. Check out the show notes to find links to my new free ebook with the three easy ways you can start using interactive slides in your classroom today, including some of the things we've talked about on the podcast. You can also link to a brand new resource that is over 100 pre-designed coordinated slide deck backgrounds. There are some for every season and holiday. You can use them for lesson planning, for desktop backgrounds, for student activities, daily slides whatever you can dream up you can create with these pre-made backgrounds. Maybe you are really ready to jump in, but you need a little help and guidance. I've got you there too. Be sure to sign up on the wait list for my new course interactive slides master class that will be coming out in October 2023. Sign up on the list so that you'll be the first to know when it's ready. 

Welcome back on our series of episodes with tips and tricks for using interactive slides in the classroom. Two weeks ago, we talked about using daily focus slides and how I started using them back during the pandemic and continue to use them teaching in person, to keep my lessons on track and focus and to keep my online resources right there at the click of a button. Last week, we talked about sharing those slides with stakeholders, from administrators to subs, to co-teachers and even to students and families. Today, we're going to backtrack a little, because maybe you haven't started using interactive slides or maybe you need to up your slide game. So this episode is all about links and how to add links to your slides and what to link so that you can get what you need in one click of your mouse. 

So if you're using slides for teaching, whether it be to organize your daily lessons or to create lesson plans, you really just need to hyperlink text. So if it's for the teacher, for instance, I use a slide deck for my lesson planner. I have a template and I create text boxes and I type in what I'm doing for each part of each day each week, and so sometimes I want to link up a website or a video or even another slide deck or another place within my Google Drive. To do this, all you have to do is add a text hyperlink. You highlight the text that you want to become your clickable button, if you will, and then you click the link button. Or you could right click and add a hyperlink and then you paste in the address of wherever it is you want that link to go. So that would be, I think, the best way to link something within lesson plans. Now, if it's for display, like your daily slides or something that you might send to parents or students, you most certainly can link text in this way. But another thing you can do is link an entire text box. So if it's something that has a lot of text in it, you can highlight and link the text, but you know it turns it blue and puts the line under it. It kind of changes the aesthetic of your slide. So if you will just select the text box and then add your link in the same way, it will make the entire text box a link so that when they click on the box it will take them wherever it is that you want them to go or that you want to go. 

The other way to add a link easily is to add a hyperlink to an image, and I do this a lot. I do this in my daily email when I link the screenshot of my daily slides. I do this sometimes in my lesson plans. If I've created a little button and I want that button to go somewhere, I might add a hyperlink to an image. I do it a lot with my daily slides. So if we have books that we're going to read for the week, or if we have another slide in our slide deck that I want to make a button or an image for, then I would link the graphic on the slide. It's just the same as linking text. So you highlight whatever image you want to create a link for and then you can click the link button in your menu, or you can right click, add a link and put it in that way, or two fingers click. 

If you're working on a Chromebook with a touchpad and maybe you're not a right clicker anymore, that's kind of going away, I think, because people are not using mice regularly, so the two finger click is just as important as the right click anymore. So that would be how you could add a link to your images. So if you're sharing with students maybe you have every week I have a little bookshelf on my daily slides and I just go to Google and I copy images that are the cover of the books that I'm going to use. I find the best videos on YouTube or record my own, and then I go back and link those to the image of the book cover so that when my students or I or their families click the picture of the book cover, it takes them to the video with that story. So pretty cool. In my plans I would just link, obviously, the text if I put the title in, but when it comes to presenting on the screen or sharing with students and families, I might add an image and hyperlink the image. 

The other way that you can include things by linking them in your slide decks is by embedding them, and so if you go to your insert menu on Google Slides, you can choose to add a video or add a sound, and when you choose from there, you are prompted with a box where you can add either the link to the video that's in your drive or the link to the video that's on YouTube and when you click Insert or Add, that video sort of pops up like a rectangle that looks like the actual video and has a play button on it, and this is called embedding the video. So what this means is when you embed a video, they're gonna watch it within the slide deck. So before, when I just hyperlinked that little book cover, when I click on that it takes me out of Google Drive to YouTube or wherever. The video is kept in a new window and I'm looking at a totally different site. When you embed the video, it stays right there on the slide and it is viewed within your slide deck. The cool thing about this is that you can resize embedded videos so you can make them, if you get really fancy, fit to the size of a little clip art you have that maybe looks like a TV screen or a smart board screen or a computer screen, or you can fit it inside a frame, or you can make it as big as the screen or almost as big as the screen, so that students could watch it right there. The beauty of this is, when using interactive slides with students for their use, you keep them right there in their Google Drive on their slide deck. They're not going out to YouTube where well, let's face it, who knows what could happen? When you keep them right there embedded in your slide, then you know they're not going to stray or wander to other videos because it's just going to show that video right there on your slide. 

For my lessons I use this all the time. For my daily slides I use it as well. I have embedded a little 10-minute timer YouTube video with some music and it's on a little clip art computer screen on a little desk in my little Bitmoji classroom. That is my daily focus slide when we are working on our journals each morning as our bell ringer when we start the day, I just click play and it plays that little 10-minute timer YouTube video right there on the slide. My students can still see everything else that's on there as they're getting settled for the class period. They can read our to-do list, they can see what stories we might read and they can watch the timer all as it counts down all at the same time. So embedding videos is very useful when you are going to have students interacting with YouTube while they're at school or working on an assignment. It goes for any other videos as well. You can embed them just the same way and they will show up. During the pandemic I recorded myself teaching 100 phonics lessons and I saved those videos and can still use them today, and I embed them into a slide that has other phonics resources on it and my students could watch it right there on the slide. So pretty useful to be able to embed videos for your students. Now, what might you want to embed or what might you want to link besides just a YouTube video, because I know we use those a lot as teachers. 

But there are lots of other things that you can link, either within your teaching and student slides or within your own lesson planning slides. I love to link videos, obviously, but also I link a lot to other files within my drive. So if I have another slide deck that's created with, say, all of our anchor charts, I will link an image of the anchor chart on the daily slide deck so that when I click it it pops up in present mode and there's the anchor chart filling the screen and we can discuss it, or my students can access that anchor chart resource for themselves to help them do their work. In my lesson plans. I also link other resources that I have saved in my drive. So on my lesson plan slide deck I will have a link each week to my focus slide deck so that I can toggle between the two really easily. 

And once you get adept at making links and you're thinking about what could you link up, you'll think of lots of other things that you might want to link. 

I'll link teacher pay to teachers pay, teachers resources that I've purchased in my plan so I can go straight to that file and grab what I need. 

I will link to a co-teachers plan or link to the actual unit we've created from my lesson plan so that if I need a more detailed picture or my administrator does, they can go straight from my plan book to my bigger unit plan. 

I also link to places where I might keep student names or class lists or other information, as well as the things that I'm going to assign to my students, so I can find them easily, to update them and make sure when I assign them in Google classroom I have exactly what I'm looking for. So the tip for today is to link text and images on your slide deck and a great trick is to embed those videos, especially when students are going to be using the slide deck to access something, a video on another site. This keeps them focused on the lesson and keeps them in their Google Drive, where it's much safer, and they're less tempted to wander and stray off to other videos or other sites. What other things can you think of to link up? I'm sure there are tons of resources, tons of slide decks, tons of videos, websites and games that you might be able to link for yourself and for your students on your interactive slides. I hope this helps. Thanks for listening. 

Hey, have you ever thought about making your own interactive slide decks? Maybe the thought has you feeling overwhelmed because you don't understand the technology, or there are just so many options you don't even know where to begin. Well, don't worry, I've got you. I am working on an interactive slides masterclass, a one-time course you can take at your own pace to learn all the tips and tricks I know for creating interactive slide decks that you and your students will love. We'll talk about how to create interactive slides like my calendars and literacy reviews, and also daily focus slides that you can use in your classroom every day of the school year. We'll even talk about how you can come up with your own ideas to create slides that you can sell yourself. I mean, if we're going to do all this work for our own classrooms, why not help other teachers and make a little passive income on the side, right? CLICK HERE TO REGISTER!


26.9.23

Interactive Slides Backgrounds


Welcome to the 21st Century K podcast. I'm Hannah at Teach Elementary School and I help other teachers bridge the gap between traditional elementary and 21st century expectations. We're continuing with our series of episodes on tips and tricks for using interactive slides in your classroom, and today we're going to talk about creating background images that make everything else so much easier. Thanks for joining. Welcome back to our series on tips and tricks for using interactive slides in the classroom. The last couple of weeks we've talked about how to share slides Once you get them finished. We've talked about how to link text and images and embed videos in your slides for student use and family use and for your own planning, and this week we're going to get a little more into the nitty-gritty by talking about creating backgrounds for your interactive slides. 

When you think about creating an interactive slide, you probably have lots of ideas in your head or you've seen lots of other people's creations that are so cool. But when you open that Google Slides app and you're staring at a blank white rectangle, it might be overwhelming to know where to begin. So I always start with the background. Like what do I want the background to look like? Do I want it to look like a classroom. Do I want it to look just like organized and cohesive, or do I want it to have a certain aesthetic, with my color scheme or something that goes with the theme that we're learning? What is my intent with the slide deck? That's what I think about when I start to create a background for a new slide. How much text am I going to have? Where are my images going to go? And then what am I going to use this for? A template or a background that you would create for your lesson planning is obviously going to look a whole lot different than something you would create for a student instructional lesson and then also a daily focus slide that you're going to present. So you kind of have to know your purpose before you start building your background. But once you know that, it's time to think about what will go behind the scenes of your slides. And the reason this is important is because you need to make sure that, first of all, any clip art that you're using, that you have purchased, is locked away and hidden away in the background, so that if someone else were to use your clip art or use your slide deck, they couldn't lift the clip art, meaning if you just pile up a bunch of pictures on a slide and share it with someone. They can copy and paste or right click and save any of the things that you've put on that slide, unless you have them secure in the background. 

So I start by choosing a background color or finding a background picture that I want to use as the whole background of my slide, kind of like my, my slate, or if you're thinking about it in terms of like a bulletin board, the paper that goes on the background. So I pick something for that and then I begin to build in the things that I want my students and myself to be able to see but not manipulate. So if it's a Bitmoji classroom that I'm going to use for my daily slide deck, I might add in some images of bookshelves or a computer or a smart board screen or even an inspirational poster or a flag or a school logo. I can add just about anything that I want, as long as I realize what I'm adding will not be part of the manipulation. I can't exactly link any of the things in the background and my students will not be able to tamper with or move any of these things when I'm making a background slide for a lesson plan template. I might create white boxes for where I want things to go so that I can organize my thoughts or what I'm typing. I might add in my name or the subject titles for each column that I'm creating things that aren't going to change over the course of the year. I'll definitely add some kind of cute inspirational clip art and I'll choose a background color, maybe for the whole year or maybe just for each month that will go behind all of those boxes and all of those words that I'm adding on top. 

Now the tip here is to create backgrounds that you can add to another slide deck where you're going to put all the things that need to be manipulated on top, and the trick is saving those slides to insert them in your new slide deck as a background. So there's a couple of ways to do this. I love, love, love PowerPoint, so I create all of my backgrounds offline using PowerPoint on my laptop, because I'm still old school and that's what I love. You could do the same thing in Google Slides, but I prefer PowerPoint. 

If you create them offline in PowerPoint, there's a way to go in and save your slide, your PowerPoint slide, as a JPEG or a PNG image file. So you go to file save and then choose the drop down menu Instead of saving it as a PowerPoint. Go down and choose JPEG. It will ask you if you want to just save the slide you're working on or the entire slide deck. It will create a folder and it will save each of those slides as an image. Once you do that, then you can go on over to Google Slides, open up a slide deck right click or two finger click or insert background whatever your method for getting there is and upload the image from your computer and it will pop it right in the background. So then all of those things are secure. You can be sure that nobody's going to lift the clip art, nobody's going to move anything around or change anything if they get a hold of your slide deck and it is absolutely stuck there in the background. Nothing you do on top is going to change how the background looks. 

Now, google Slides, I think, can be saved this way, but it's a little trickier. So I bypass all of that, and when I create a background on a Google slide deck that I want to save as an image, I just either screenshot and crop down the entire computer screen or I use the snip tool and just snip that screen and save it as its own image, and then I upload it into a new slide deck, the same way I would a JPEG or a PNG that I saved from PowerPoint. Once you do that, then you start adding all those links, all that text, all those images, maybe even something that you might change weekly, like your little bitmoji or the images of covers of books that you're going to link. You can put those right on your little shelf that's in the background. It not only makes it easier to use and less likely that anyone can make changes, but it also makes your slide decks load a lot faster. So the trick is that once all of that heavy graphic is in the background, you don't have to wait for each individual thing to load when you open your slide deck. If you've ever used a slide deck from someone who hasn't secured their background, you'll know that when you pop that slide open, it sometimes takes a while for every little image and every little piece to pop up. And when you get carried away layering stuff like I do, who knows how many things might be in the background. 

This week's tip is create your own personalized backgrounds, save them as images and then pop them into the background of your slide deck so that you can add all the interactive parts and pieces, all the linkable texts and images on top, so that you've secured your clip art, nobody's going to make changes and your slides will load a whole lot faster. Hope this helps. Thanks for listening. Still feeling stuck on creating your own backgrounds? I get it. That white rectangle can be really overwhelming when you sit down to create something new from scratch. That's why I've created a new resource with over 100 pre-designed, coordinated background images that you can copy and paste right into your own slide decks and then add on top to your heart's content. You can find this resource by clicking the link in the show notes. Maybe you're ready to make your own, but you need a little more guidance. I've got you covered too. CLICK HERE to learn more about 21st Century K's Interactive Slides Masterclass!


22.9.23

Sharing Interactive Slides


Welcome to the 21st Century K podcast. I'm Hannah, I teach elementary school and I help other teachers bridge the gap between traditional elementary and 21st century expectations. In this episode, we're going to kick off a series of episodes with tips and tricks on how to best use interactive slides in your classroom. Hopefully, these will be things you can take back and put into practice immediately, starting with today's tip on how to share slide decks with co-teachers and families. Thanks for joining. In last week's episode, I talked all about how I use daily focus sides to keep my lessons organized and to share with co-workers, administrators and families. So for the first trick and tip to using interactive slides in your classroom, I want to talk about how I share slide decks that I've created with others, and there's actually several different options for sharing that you may or may not have known about or maybe forgot, and this will be a great reminder. The first way to share a slide deck or any other Google file is to click the share button within the file and send it to people within your organization by adding their email address. So when you do this, you have two options. There's a little drop down menu beside each email address and you can select viewer or editor. When you select editor, that gives the person who follows your link rights to make any changes within your document. So if you're sharing daily focus slides with a paraprofessional or a special education co-teacher who needs to go in and make changes, then that is the perfect link to give them. It's a perfect way to share. If you are going to collaborate on creating and editing the slides, you might also do that with another teammate who's teaching the same content or what have you. These people also may benefit from a copy link and you can choose that on the share menu as well, so that it forces them to make their own copy of your file. So this would take away the opportunity to collaborate within the same document, but it would give them their own so that if they personalize it or make changes to use in their classroom, they can do so freely without making changes to your original. Now, when you click the share button, you can also choose viewer from the drop down menu after you add the email addresses of people within your organization. 

The viewer link is great for administrators or other teachers who are just going to be looking at what you have or showing it to students reading it for their own knowledge or just checking in on whatever it is that you're teaching. This is the link that I use for substitute teachers. It's been really great for me to be able to leave that link or link it in a digital lesson plan that I share so that my substitute can pull up my daily focus slide and have it on the board when students come in. This really helps the subs lesson stay on track and it mimics what we would be doing if I was there. So it takes out a lot of those questions from the students like what are we going to be doing, or we should have been doing this, or Ms Stark says that we do it. This way, you can actively communicate through that daily focus slide and it really helps a subs day on track and it gives your students some comfort and stability that the day is going to go, maybe hopefully semi normal. So those are the share options within the Google slide document. 

Now I don't use either one of those share links with my families, and that's where today's tip and trick really comes into play. In my daily emails I include a link to my weekly focus slide deck. I have found that many families enjoy just reading up on what it is that we're learning. Some families may even be so inclined to click some of the resource links or help their child with some of the content, ask them about it, have a conversation about how they're doing, or access the resources when their child is absent from school, so that they don't get too far behind. It is just a really great and easy way to share with families every single week exactly what you're doing and using in the classroom, and I am all about transparency when it comes to teaching and when it comes to working with families and everybody getting on the same page and being on the same team for my students. 

I found while I was teaching kindergarten online that sharing that link from within the document was a little bit cumbersome for families. Even when I send the viewer link, when they open the slide deck, it still looks like it's in the Google Slides interface. So all the toolbars are still there, even if they are not available for use. All of the thumbnails are down the left side of the screen and sometimes the print is really tiny because there's all that dead space around where you've created your slides and it can just be ugly, for lack of a better word, and if something is not easy to use or pleasant to the eye, most people won't use it. 

So I started thinking about how I might be able to share my slide decks in a way that it looks more like a website, and that's when I started sending my daily slide deck link as a present mode slide deck. So you may or may not know that when you open your slide deck in the address bar it's this really long Google address for accessing your slide deck or your file. If you go all the way to the end and delete the text after the last slash you'll say it usually says like edit with some numbers and some coding. If you will delete all of that away and replace it with the word present P-R-E-S-E-N-T, and then highlight and copy that entire address from the address bar and use that as the link that you send to families, when they click it it will automatically open your slideshow in present mode and you can't get out of present mode from there. So what that does is it gives families the slide deck with none of the extra stuff around the edge. There are no toolbar showing, there are no thumbnails down the side, there's no dead space around the slides themselves. It just pops up the slide and everything that you've hyperlinked is accessible and they can click through if you have multiple slides and find what they need. They can also access embedded videos within the slide or even embedded sound bites, if you ever use any of those. It is pretty cool. 

If I do say so myself, when families click on this link it pulls it up and it looks kind of like a webpage. Now, if you're using interactive slides with movable parts that you want students to manipulate and change, this is not the best link to send, because obviously, in slideshow mode you cannot manipulate any of the pieces. You have to be in edit mode for that, unless you have a new extension that I can't wait to share about in the next couple of weeks that allows you to move things in slideshow mode. It's game changing. Anyway, I digress when it comes to sharing the present mode link with families. It just makes it so much easier. 

Now, if you want to take this trip, tip, tip and trick to the next level, then you could screenshot your slide and put a little image in your email and hyperlink the image with your present mode link so that when families open their email, there's the image. I think people are far more inclined to click an image than they are to click text. So when the image is there and you hyperlink the image and they click on it, it will pull up your slide show in present mode where they can access the resources and click through if they need to. If you are feeling like you can really take this to the next level, then you are gonna love this trick. This is the magical part to me. It's what makes my job easier. 

So what I have done is created one slide deck that I have named my Master Weekly Slide Deck and I have it saved in a folder on my computer In my Google Drive. For that particular slide deck, I got the present mode link. By going to the end, deleting the last part and replacing it with the word present, I copy that present mode link and created a shortcut bitly URL. So if you take that entire address, go to bitlycom and put your entire present mode address for your Master Slide Deck and on the Bitly site it creates a shortcut link. So I have a shortcut link that's bitly forward slash, stark, daily slides 2023,. Let's say, I create that shortcut link and then that's the link that I use for my emails and for any other place that I'm sharing my daily slides in present mode with my families, and this is where I save so much time and energy. 


I have a folder with a slide deck for each week of the school year. Every week I pull that slide deck up and make adjustments for the new year and then I copy and paste those slides into my Master Weekly Slide Deck. That means that when anyone clicks to access that Master Weekly Slide Deck, it will automatically have the updated slides for the current week. Oh, this means I do not have to remember to go back and link every individual weekly slide deck in my emails. I just use the same link every single time. It is the same link that I can leave for a sub if they just need to access it in present mode. It's the same link that I can send on a whim to a family if a student is maybe sick or absent for a long period of time. And it's the link that I put in my emails every single day. So I do not have to remember to change out my links, because every single week I just change out the slides. I have that same slide deck bookmarked at the top of my Chrome homepage so that when I get to school I click daily slides and up pops whatever I need for the week, right there before my eyes. I use the same shortcut link for families and they're able to click and access my daily slides at any given time. It has been a total game changer and it's been totally helpful for many of my families. I hope that it helps you too. 

So let's recap. The first tip and trick that we have learned for using Interactive Slides in the classroom is to share them. You can use the share links and the copy links within the Google Slides program to share with coworkers, co-teachers, teammates, administrators, substitute teachers and anyone else who may be helping in your classroom. But you can use that special present mode link to send to families so that they can click and access your slide decks from their phone, from their tablets, from work or from their home computer. Simply go to the end of the address bar and delete all of the text after the last slash and replace them with the word present P-R-E-S-E-N-T. Then grab that entire address and use that for your families. Or, if you're really feeling fancy, grab that entire address for your master slide deck, create a shortcut link and send the same shortcut link to your families, day after day, week after week, while you just change out the slides in the background to prep for each new week of school. I hope this helps and that you are ready to tackle your daily focus slides this week. 

Hey, have you ever thought about making your own interactive slide decks? Maybe the thought has you feeling overwhelmed because you don't understand the technology, or there are just so many options you don't even know where to begin. Well, don't worry, I've got you. I am working on an interactive slides masterclass, a one-time course you can take at your own pace to learn all the tips and tricks I know for creating interactive slide decks that you and your students will love. We'll talk about how to create interactive slides like my calendars and literacy reviews, and also daily focus slides that you can use in your classroom every day of the school year. We'll even talk about how you can come up with your own ideas to create slides that you can sell yourself. I mean, if we're going to do all this work for our own classrooms, why not help other teachers and make a little passive income on the side, right? CLICK HERE to learn more about 21st Century K's Interactive Slides Masterclass!

6.9.23

Daily Focus Slides in 21st Century Elementary

I still say PowerPoint is superior and there are many things PowerPoint can do that Google slides cannot just yet, but Google slides is a pretty close second. I started creating daily slides that I used with my online lessons, both to share over Zoom and also to send to families so that they could access the teaching content as well on their own time as they worked through assignments. The first slide in the slide deck would have all the expectations for the day, the things that they needed to have ready for our live lesson. It would have the cover of the book we were going to read and, of course, my cute Bitmoji, who was prepared for whatever content or season or holiday was around the corner, and I would post this at the beginning of each of my live lessons and from there I had other slides that I would go to that were made to look like classrooms for each subject area and that would sort of signify in a visual way that we were switching to new content, and also was a place for me to show things like anchor charts and vocabulary word definitions, as well as pictures of the worksheets that they needed to pull from their folder in order to work with me when I was live online. In addition, I could put pictures of completed worksheets so that when parents went back to that slide deck later, they would see what the answers to the questions were in order to better help their children. 

It was really a pretty cool thing, if I do say so myself, and when I went back to teaching kindergarten in person, I continued to use my slide deck resources. I mean, I had spent a lot of time on those and I had also done tons of research and found all kinds of slides that were made into libraries about different thematic contents or author libraries or activities or science videos. In fact, there are still more, or there are still bitmoji classroom groups on Facebook that are active today. If you join them, lots of people share free resources they've created. You just click it, copy it to your Google Drive and then you can access the slides to add them to your own slide decks and many of them are made to where you can edit them and use them as you see fit. 


So because I had created this vast collection of slides, I thought well, why can't I use this to help me in the in-person classroom? I posted my daily or weekly once I was in person morning slide that had the letter we were studying the book we were reading, the lunch choice for the day and all kinds of other things listed along with my cute bitmoji, and this would be posted when the students would come in the classroom each morning. Behind that, I would have linked up a slide for each subject area and also slides with those cool libraries and videos that I talked about before. Then I could project this and talk a little between the slides and access any of the content that I needed at any given time during the school day. It became really, really useful in the classroom. 

So when I moved to fourth grade, I continued. I definitely still have my first slide and I still use my bitmoji, even though it's kind of cheesy, and I have a slide for each day of the week, but it looks a little different For the big kids. I have listed the activities that we're going to do for the day. I have my ICANN statements and my guided questions, guiding questions, guided guided questions. Easy for me to say Sorry, my guiding questions posted, but I also link up whatever texts we're going to be reading. I have a 10 minute timer that comes in really handy for journal entries and other things like that. On my morning slide for my homeroom I link to our school news and so I can get that with a click and show it to my students and include the lunch choices and just all that good stuff. It really makes the transition to reading class easy because it's popped up on the board and there's no guessing what will happen in class that day. Students can come in, look at it and know what the expectation is going to be. But organizing my day is not where these daily focus slides end. 

I really, really liked when my online families back during the pandemic could access those slides and use them at home. So when I taught kindergarten in person after the pandemic, I would link my slide deck in my daily emails and it became really great for families to click and go in. They could review concepts and contents, they could watch video lessons, their students could click and read some of their digital guided reading books to their families and it was a great way for families to make connections with what we were learning in school. I continue to do the same thing in fourth grade, sharing my slide deck with families every week. It's wonderful for the older kids because if a student is absent or gone on a trip, they are able to access each daily plan and also access the text that we're reading, because I try to include a YouTube link for each book that I'm going to be reading, which is super handy when I don't have a copy of the book or I need to speak with someone, but the class needs to keep going forward or I lose my voice and don't feel well and feel like reading that day. 


It's nice to have all of those digital links right there handy for myself and for my students and their families, but I also share these slide decks with my collaborative teachers, with substitute teachers and with my administrator. There's no question what is going on in my classroom and I have one place for my co-teachers, collab teachers and anyone else who comes in the classroom to access and view and help students with what we're working on. It's really become an important part of my lesson planning. In fact, because I love Google slides so much, now I even do my lesson plans on Google slide and each week I link to that slide deck. It's so wonderful when we can create systems to help ourselves in the classroom that we can use over and over again, and that's why, after taking the time to create these slide decks last year, I'm reaping the benefits my second year and fourth grade when I go to that file, pull up the slide deck for the week, check the links, make a few tweaks, change the day and I am ready to go each Monday morning. The time saved is well worth the work that I put in on the front end creating them the first time. Aside from just keeping me on track while I'm teaching, my daily focused slides help my students stay focused on the lesson when know their expectations, and they help my families be able to connect to our education my co-teachers and collab teachers to access what we're doing each day, my administrators, if they want to keep tabs on my fourth grade classroom, and even my substitute, when they come in, has access to everything that we're doing that day. It has been a huge help in my classroom and if you don't use daily focused slides, I highly encourage you to start. Start with one, see how you like it, and I guarantee you'll be adding to them and saving them year after year, just like me. Thanks for listening. 

Hey, have you ever thought about making your own interactive slide decks? Maybe the thought has you feeling overwhelmed because you don't understand the technology, or there are just so many options you don't even know where to begin. Well, don't worry, I've got you. I am working on an interactive slides masterclass, a one-time course you can take at your own pace to learn all the tips and tricks I know for creating interactive slide decks that you and your students will love. We'll talk about how to create interactive slides like my calendars and literacy reviews, and also daily focus slides that you can use in your classroom every day of the school year. We'll even talk about how you can come up with your own ideas to create slides that you can sell yourself. I mean, if we're going to do all this work for our own classrooms, why not help other teachers and make a little passive income on the side, right? CLICK HERE to learn more about 21st Century K's Interactive Slides Masterclass!

27.8.23

Student Keepsakes in Kindergarten


In kindergarten especially, student keepsakes are a big deal. When I think about my kindergarten plans, I know that there are certain times in the year when we're going to be creating and making and saving things to send home to families, and that's a big deal for me as a teacher and also as a mom to have something to save and look back on. But as a teacher and a mom, that can also be very overwhelming. Some families will keep every single piece of paper that we send home and some families won't keep any and they'll rely on us to do the saving of the special things to send to them. So I came up with the system my last couple of years in kindergarten that really helped with all of that and also had purpose in my classroom I started coming up with weekly writing and art activities and I use them in a multitude of ways. But as far as the keepsake portion goes, I would save these weekly activities for the whole entire year and then put them together in order and bind them and give them to families as their big book of kindergarten keepsakes. And it's something that as a mom, I totally would have appreciated because it's done, it's put together and I didn't have to try to keep up with things over the course of the year. So my goal was to help families to be able to save something from their kindergarten year, but also help myself as a teacher and make sure that we are continuing to meet our standards and grow our students while also creating some quality work and some things worth saving, because, let's face it, every single math worksheet isn't necessarily worth saving. So this is how I complete this, and my husband still does this today in his kindergarten classroom, and his families really enjoy getting this at the end of the year. 

Every week my students complete some sort of writing task. I use this as a handwriting practice for the first part of the year, where students might trace a poem or a sentence or they might copy it if they're developmentally ready for that. They might also have some open-ended writing prompts or some fill-in-the-blank type writing prompts as the year goes on and I pull these prompts from our thematic units of study, so inevitably they go with the seasons and they go with the special days and holidays, and so it gives a very easy glance at the course of the year when you put them all together. In addition to those writing activities, we do an accompanying art activity, and this may be as simple as following the directions and coloring and cutting. It may be using different types of art media like paint or collage with glue, and it also goes with the theme and goes with the handwriting. So I automatically have built in for myself, every week of the year, a multitude of things. 

I've built in a writing activity, slash handwriting activity, however I so choose to use it, that I can differentiate. I have built in an arts and crafts activity that's all thematic based. I have built in these projects that I can do with my students in different ways. So some years I do some more broad learning centers where students work on different things different days of the week. So one center would automatically be handwriting and one would automatically be art, and so we'd have these things completed by the end of the week. There have been other years, especially during the COVID days when we couldn't work in small groups, that the entire class would work on handwriting one afternoon a week and the entire class would complete art projects, or maybe a few students at a time would pull to the table and work with my assistant if it was a more complicated art project. But they're very versatile, very easy activities that I can work into my week. 

I can know that I am able to differentiate. I can know that I am able to do activities that go with my theme. It's thundering here right now, I don't know if you can hear that, and I know that I have something already planned and prepped for the week. I mean, how great is that? And then comes the magic. I take a 12 or 18 by 24 piece of construction paper I invested in a lot of that before the school year starts and I glue the handwriting at the bottom, with the page vertical and the handwriting activity is usually landscape and then at the top I attach the art project. These work displays then can hang in the hall under each student's name and picture for the duration of the week. So now I have differentiated activities. I've included handwriting and art, I've included optional centers and whole group activities and I have hallway work displays that go with the theme, and I know we're going to constantly be changed out when I complete them every week. That's huge. I mean, there's nothing more embarrassing than glancing at your art displays in the hall and realizing that you still have fall leaves and it's snowing outside. This way I have a schedule and rotation for what I'm displaying in the hall so that my displays are current and that kids are seeing that what they do matters and it's going to be shown, and when parents visit there's something fresh for them to see. Administrators love it too, and so I have that already built in to my weekly plan. I don't have to think about it or do anything extra special, unless I just so choose to. 

The last part of the magic is when I save them. I did these types of art and handwriting displays for years and would send them home every week, and then one year I thought wait, a minute, I am missing an opportunity here. When I send these home every single week, parents are probably fumbling with a place to save them or, to be honest, throwing them out. What if I saved them? I kept them in order, I bound them and then presented the families with them by the end of the school year. So that's exactly what I started to do. I saved the displays for the whole entire year and they make a big 18 by 24 book. I punch holes in the sides and use jump rings to attach them. You could get really fancy with ribbons and you could do a cute cover where kids color in the words kindergarten keepsake, or you add some photos. However you so choose to do, it is up to you. But the thing is, when you get to the end of the school year. You don't have to make anything except the cover. You just keep them stored in a cabinet and keep them in order and bind them and, boom, you have an awesome kindergarten keepsake for the end of the year. 

I've been brainstorming ways that this same type of thing can be done in other grades and I would for sure do this if I taught first or second or even third grade. I would just change out what I was doing so that it was age appropriate. But you know, every week I'm probably going to have a writing assignment and every week I would love to have an art activity. So this would be a way to incorporate those things into my plan and plan for the end of the year, while also having some displays and some key keepsakes too, and meeting my standards as a fourth grade teacher. I've really thought about this because I would totally love to make something like this for my students. Last year it just really didn't fit on my teacher plate. You know what I mean. 

But this year I'm brainstorming ways to create something like this. I would love to take time out of my reading class to add art. I just think anytime you can involve the arts in your learning, it helps all students deepen their understanding, have a creative outlet and make connections with what they're learning, and so my goal for this year is to come up with those activities as I go through the school year and maybe, instead of weekly, I'll have something for each unit of study so that at the end of the year we can put them together in a binder or folder or some other easy publishing way to send home with family so that they have something to save for their fourth grade year. Because, as my principal tells me or reminds me, the fourth grade at my school is the kindergarten of the elementary school. That's why I feel like it's kind of been a great transition for me and kind of been a perfect fit. 

Maybe you teach fourth or fifth grade and you're in a K-5 elementary school. You could definitely think of ways to include what you hang in the hall in a keepsake folder that you give to families at the end of the school year. It has tons of benefits and will be something that your families will always treasure. And, as we've been talking about, making positive connections with students and families is really what it's all about and really what makes for a successful year. Thanks for listening. Do you teach kindergarten or maybe first grade and you're interested in the handwriting and art activities that I do, I would love to share them. If you'll check in the show notes, I'll link to my TPT store where I have four art activities and four writing activities for every month of the school year, august through May. You can grab those, start printing and start creating your end of the year keepsakes this week. 


13.8.23

Lesson Plans in the 21st Century

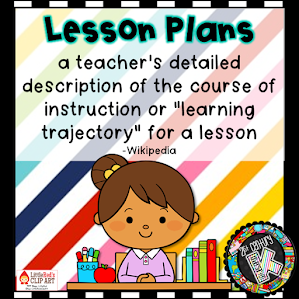
 Lesson planning is a huge part of being a teacher. I mean, you can't just walk into a classroom and start teaching children without a plan.

You have to know what you're going to say, what information you're trying to convey to your students, the resources that you're going to need have to be on hand and your activities have to be prepared. You have to know your standards in order to be able to plan activities and then reflect to make sure that the way you're delivering your instruction is working for your students and that they're learning and their growing planning lessons is a big part of what we do. And it is so important to do it well.

And for many years, lesson planning was just the same old thing. You might work a week in advance or you might work on Sunday night before Monday. Whatever the case, teachers put their plans down in an old school plan book or maybe even on a personal e-mail template, maybe even on an online template that had to be turned in or saved from year to year. I know when I was in college, we wrote those six page lesson plans for a one 20 minute activity, and we quickly found that in the real world, that was impossible. And we learned all about the shortcuts in the shorthand for writing lesson plans that would be helpful to us personally in the classroom and also to us in the event that we weren't there.

But lesson planning came to a screeching halt on March 13th. Anything that any of us had planned for the 16th was out the window on March 13th, 2020, I walked out of my classroom not knowing what to expect in the weeks and months to come.

We had hurriedly prepared some packets based on our plans for the next week or two to send home with our students so they would have activities. We started quickly learning how to communicate more via the Internet and deciding how we were going to reach our families and stay in touch with them during such an unprecedented, uncomfortable and uncertain time. The lesson plans that I left on my desk that day ended up meaning nothing. And then the lesson plans that I made from that point forward, oh, they were just jotted notes here and there and maybe a pile of activities I wanted to get to or an email I would send to myself with something I found on the Internet we might be able to do over a zoom meeting.

And then two weeks became four weeks, became six, became eight. And the next thing I knew, we were finishing out the year and the last several weeks of my planning book were empty. It really caused me to reflect about lesson planning and really on a deeper level, planning for life. We were supposed to head to Florida for spring break in the spring of 2020, and that didn't happen. All kinds of plans fell through for everyone. And it really makes you stop and take inventory and think about whether or not you're living in the future or living in the moment. When it comes to making lesson plans, there are a few key things that we need to do to stay ready in the year 2020, when my school year started, all of the school district was online.

So our lesson planning was completely different than how it had been the year before.

We could not do all the same activities.

We didn't have centers and choices for play or hands-on manipulatives.

We were sending home some worksheets and prepping online activities, something that went completely against the grain of myself and my entire team.

We were going back to the basics when it came to planning our lessons in so many ways, but at the same time having to be incredibly innovative and try new things. After a few weeks, some students came back to school and some stayed online, I've been teaching kindergarten online since August and while it is hard work, I'm really enjoying it.

And I've learned that planning this year is different. And in turn, lesson planning for me will be different from here on out. It's funny how these things happen in our lives that we think are going to be a challenge we think are going to be difficult and they cause us to grow and stretch and change in ways that we never thought we would. And in the end, we can come out ahead and better for it. When we look for the silver linings and lesson planning has been a silver lining for me. I've learned through this time that lesson planning in an uncertain time has to be both short and long term.

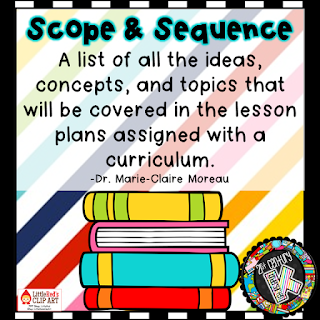
And that may seem simple, but if you do not have a long range scope and sequence plan for your year, it will make it very difficult to chunk that out so that you can make short term plans in order to address the needs you have at the moment. What I mean by that is my team has a plan for every subject for every week of the year that we carry forward. Every school year we go back and revise based on the calendar dates, and we may make changes when there are changes in our standards or in preferences about what we teach or like this year, when we learn how to teach better, we are starting from the same place with our long range scope and sequence. So having that has made planning easier. If you don't have a scope and sequence of plan, I urge you to create one. It's something you could spend all summer on, or you could work on it a little over the course of the school year. And by the time the year ends, you'll have something for the following year.

But once you get all that information in one place that you can refer to and go back and see that all of your standards are covered, all of your core tier one instruction is covered and planned and mapped out, then you'll be able to breathe a little and be able to make decisions in the shorter term about prioritizing your lessons, choosing your activities and planning for an uncertain time.

That's where the short term plan comes in. We have always planned a week in advance and in this situation that's just not working. So my team has been planning upwards of two weeks in advance so that at any given moment we are prepared with a game plan for the following two weeks and that short term plan isn't fancy. It might be on a Post-it or jotted on and out. But we know what the plan is for the next two weeks with a little more detail and to where we could put things together to switch gears and pivot on what we're doing at a moment's notice. For instance, right now, we just finished week seven. We have week eight already in the works planned in the books, activities prepped, copies made. My students are at home. They have what they need. Students in person and teachers in person are prepared as well. But in the meantime, we also have weeks, nine and ten mapped out with activities selected and in the process of copying and prepping the things we'll need for those, it takes a lot of thought to. Keep these short term plans up to date and a lot of prep time on the front end, however, if something happens in the next few days and we need to switch gears and all go online or switch to a hybrid model, or if my children all come back in person, we will be ready.

And I can not begin to tell you the peace of mind that that gives me and my entire team. So you need a long term plan to go to to make sure that everything's mapped out and everything's going to be covered. And in the meantime, during this time when we don't know what the next two weeks may hold, it's important to have a two week short term plan to get everything prepped and ready to go on a moment's notice in any direction. 

The thing that has really made a difference in my lesson planning this year is that I've finally gone digital. I know it's funny that I talk about bridging the gap between old school and 21st century when in so many ways I am still so old school. That's because old school works. It's tried and true. And I love a teacher plan work and my number two mechanical pencil.